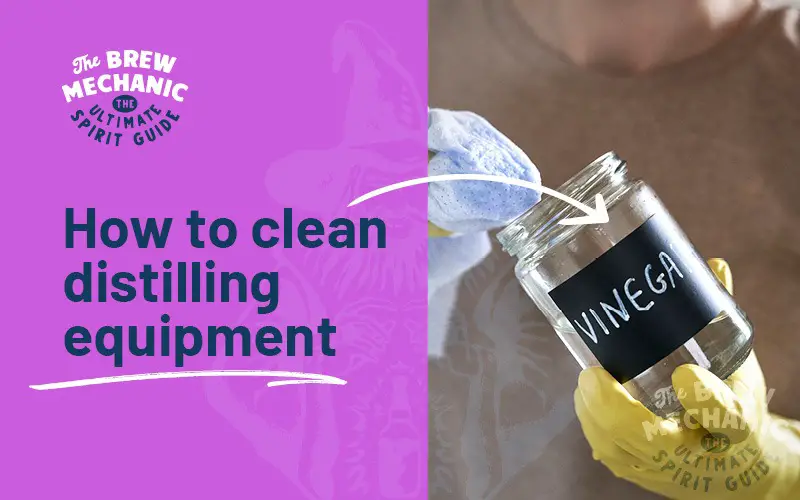
How to clean distilling equipment
Disclaimer: This post might include affiliate links, through which I may earn a small commission without any extra cost to you. Additionally, I am an Amazon Associate and earn from eligible purchases. All the products and services I suggest are ones I have personally used or would use. Thank you very much for your support if you decide to buy through any of my links!
Come join the Distilling Squad!
Get the best fundamental tips & tricks here. Woohoo!
Cleanliness is key in the world of distiller! If you’re passionate about producing high-quality spirits, it’s important to know how to clean distilling equipment. We want our brewing equipment in good clean working order every time.
Our simple straightforward guide will take you through the step-by-step process of sanitizing and removing residue, ensuring your equipment is in optimal condition. Get ready to enhance your distilling experience and savor exceptional spirits every time.
If you want to jump to the juicy bit of cleaning your equipment. Choose below:
Basic background before cleaning your equipment
Before you sanitize, the equipment used before must be clean, free of grime, fermenter thoroughly washed out. You can use a bit of plain bleach on the fermenter to get rid of that residue line. Be careful when using soaps as you can leave a small amount of residue that can lead to bacteria growth.
Stainless steel still or copper still for cleaning
Understanding of copper vs stainless steel chemical reactions
Copper heat exchange properties are very good and much better than stainless steel. Copper also has the ability to remove sulfides that stainless steel does not have.
The sulfides are produced during the fermentation process in the wine, beer and whisky process. Seldom found in sugar washes. For making stills copper was the material of choice because of its workability.
The downside to using copper is that it is difficult to clean and equipment must be disassembled and the metal has become more expensive than stainless.
The other downside is that a copper still should be thoroughly cleaned after each use.
The preferred material now is stainless steel grades 304 & 316 as these grades do not affect the flavor or odor of the product and are easily cleaned and sanitized. But not easy to work and weld with for the DIY person.
Stainless can’t remove sulfides as copper does. To get around this problem copper internals are inserted to remove the sulfides in the hot vapor path which can be removed for cleaning.
Complete units have been made from stainless replacing copper. You must still put copper internals into the hot vapor path to remove the sulfides.
The other plus for using stainless is that it is much stronger than copper and easy to clean.
What is patina in Copper still?
Copper reacts to oxygen over time (oxidizes) and develops a dark brown/green look to it if not cleaned regularly. The outside of the still can develop a dark brown look but the inside must be clean and no coloration.
Should your alcohol go blue this is linked to copper not being cleaned properly and flushed out afterwards. This can affect the flavor and who like blue beer?
Why do we clean distilling equipment?
After fermentation and distilling, there are good and bad bugs (bacteria) microorganisms found on the surface of the equipment used. The equipment must be cleaned, flushed with hot water, sanitized then dried to make sure it is ready for the next use. This is when a cleaner comes into play.
Knowing how to clean distilling equipment is a must. It should be cleaned/sanitized and then dried to make sure it is ready for the next use.
There should be a procedure in place that helps you to follow when doing this. Make notes of what you have used amounts etc. Should the surface be contaminated it could lead to contamination. unwanted odors and taste.
What do we clean the distillation equipment with?
The cleaning solution depends on the material being used such as copper, stainless or both. Once you know your material the fun or not so fun part of cleaning. We the products and equipment needed.
Stainless Steel – Soap:
For this part, I get the cleaning products from your local brew store, this is to make sure there no possible reactions and so forth. So the products below are my choice and makes me happy to know my equipment is always clean.
Products like:
Copper – Home remedy & commercial products:
Home Remedy – (Well known in the distilling community):
Now the age-old favourite of white vinegar, flour, and salt, we will know that vinegar solution for cleaning is amazing. The other favourite is the 5:5:1 solution which is easier to work with than the paste. This is perfect for copper still, and many other things… Hint hint, nudge nudge.
Commercial Products:
We have commercial products which can be bought and must be followed carefully including the safety requirements.
Sanitizer – finish off:
Please ensure sanitizer is used after the equipment has been cleaned and before use. That is make sure there is no contamination involved. VERY IMPORTANT. It is like making sure you don’t leave the old raw chicken on your cutting board, the same principle.
Products like:
Cleaning Equipment:
All this is very important as we want our stills to be clean on the inside. Here is our simple go-to cleaning equipment to get the job done.
Safety precautions:
It is all about safety here, we want your beautiful eyes to keep being beautiful. So in all cleaning/sanitizing you should wear household PVC gloves and plastic safety goggles. As you don’t want any soapy water or anything a like to get into your eyes before cleaning the still and equipment as well.
Ok cool, we have clarified we you need some safety. So let’s dive into the methods.
Methods of How to clean distilling Equipment
With these extremely simple cleaning methods. We ensure that your next batch of spirits is as pure and delicious as can be. How great. So here is the juicy part of cleaning.
Fermenter
Stainless Steel Equipment:
Stainless steel distillation equipment is extremely easy to care for. What I do is visually checking the system for residues build up. No need to disassemble anything. Simply rinse with soap (products above) and water mixture the boiler, column, and condenser.
This you only do every 5 > 10 runs.
What you can do if you use copper in the column to remove sulfides is first remove the copper internals, dunk them into the 551 solution till nice and clean. Flush/wash the copper items then put it back into the column.
While the column is empty you can wash it out with a dishwashing liquid using a toilet type of brush. Or make one with clean rags that you pull back and forth.
Note on the first run after cleaning, what you can also do is take a slightly larger cut of foreshots/heads by doing this you clean the column at the same time before switching to the hearts cut.
Copper Equipment:
There is definitely more of a mission to clean your copper equipment… I know you love the shining bits and bobs. Ok, let’s dive in!
Before starting any of the methods, you must disassembly units.
Method 1 – Home Remedy – Paste – Vinegar, Salt & flour:
Method 2 – Home Remedy – Solution – 5:5:1 solution:
Disassemble the unit. For cleaning the kettle, column then condenser.
1. 500ML of water
2. 50ML of 3% hydrogen peroxide solution.
3. One ounce / 28 gram of citric acid
Mix up the solution in a closed jar till dissolved. Water, peroxide and acid. The solution will turn a blue green color when coming into contact with tarnished copper showing you that the solution has worked and removed the tarnish.
- Clean out the Kettle section, by hand use a long brush, washing it by hand till nice and clean, confirm by visual.
- Clean out the column section by hand using a toilet type brush till clean. Remove the internals and soak them in a solution made up as above.
- Clean out the condenser section.
To clean out the condenser, put some of the 5:5:1 solution into the tube leave for say 20 minutes, shake then drain off. Then take a small section of copper sized to the tube tied to a piece of fishing line both sides.
Feed the line to the outlet add some solution into the tube, pull the scrubber to the outlet. Now add some more solution onto the scrubber and pull it back to where you started. Do this a few times.
The tube will be cleaned inside. Look at the copper inside and decide the frequency.
Method 3 – Commercial Products:
You can clean your copper thoroughly using commercial copper cleaning products. There are lots on the market. Follow the instructions carefully. The reason is that each product will have different instructions.
In all cases, the equipment that has been cleaned must be rinsed afterwards with water. Sanitize the equipment before using the distilling equipment. This can be done by using Star San or the one of your choice.
Suppliers of the cleaning equipment
General maintenance tips
Draw up a procedure list of jobs to be done to help you. Time, dates etc.
Download our Cleaning Checklist
Well done – you learnt how to clean distilling equipment
Just like cleaning dishes and you want to keep our equipment clean and not dirty… In saying that learning how to clean distilling equipment is a crucial step to maintaining distillation quality and your equipment of course.
You have to know if you are using copper or stainless steel, there are specific cleaning methods and products to consider.
Sanitizing the equipment is essential to prevent contamination, and using cleaners like vinegar (home remedy) or specialized products can effectively remove residue and grime.
By incorporating these cleaning practices (don’t you love cleaning), you can enjoy the art of distilling with peace of mind and consistently produce exceptional spirits.
Last Updated on July 20, 2023 by The Brew Mechanic
Disclosure: I may receive affiliate compensation for some of the links below at no cost to you if you decide to purchase a product or service. You can read our affiliate disclosure in our privacy policy. The information provided is for entertainment only.

With 35 years of knowledge of being a chemical engineer in alcohol manufacturing plants, my mission is to teach the next generation of home distilling alcohol brewers at a supernatural speed.
My reviews are based on real-life experiences with reflux stills, sugar wash, troubleshooting and mystical chemical reactions.